Transfer or Copy Photos to a Windows Computer
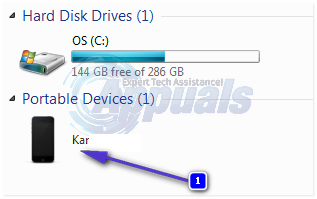
Connect your iDevice to your Computer using the USB Cable you have which is the same that you use to charge the Phone. Once done, put the iDevice to a stable position so that it’s not touched or moved, otherwise the process may be disrupted if the cable or the usb socket looses the connection due to movements/motions. If iTunes is installed, close it and if it’s not installed, then you won’t get the auto dialog for iTunes. Once it is connected, you may see an Auto Play option or this icon in the taskbar. Hold the Windows Key and Press E to open File Explorer. If you are running Windows 8 or 10, then choose “This PC” from the left pane else click on the name of your device under Portable Devices.
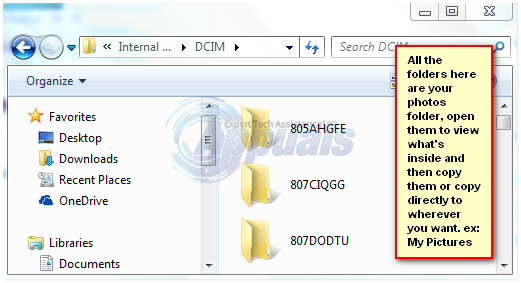
Once done, you will see the Internal Storage folder for your iDevice. Click on it and then click the DCIM folder.
Once inside the DCIM Folder, you will see the folders containing your photos. Now, from here you can either copy them directly the entire folders, all folders, or open each folder and copy photos individually.
Copying them is easy, to copy all folders, simply hold the CTRL Key and Press A. Then hold the CTRL KEY and press C. This will copy all the folders, then go to the folder where you want to paste them, and press CTRL KEY and Press V. These combinations should be pressed simultaneously. You can also copy individual folders, just by right clicking the folder and selecting Copy.
Make sure you remember what you copy. It is a good idea to copy all then a few selected ones, if you’ve got loads otherwise there are high chances that you may forget what you want to delete from iDevice and end up going back and forth checking whats on the Device and what you’ve copied on the computer. Copying all, and setting a time such as “you’ll do it after every 2 months” makes the management easy, you can create library and name it this way “Jan to Feb 2015”, copy all, delete all from iDevice. Then, from Mar 2015 to Apr 2015, copy all to computer in the created folder, and delete all from the Phone.
Transfer or Copy Photos to a MAC
The easiest way is to simply sync it. It will know what it has synced and will maintain it’s internal record. This way, you will not have to manage the photos, ex: saving the same photo twice or thrice. To do this, connect the iDevice to the MAC System via it’s USB Port. Then, open iPhoto from the icon in the dock, or from Finder -> Applications. Then choose the Photos you wish to transfer. Choose Import if you want to import all photos, else choose Import Selected.
On MAC Systems, it is pretty easy. You can do the same steps “import”, “import selected” with almost any mac software capable of doing this such as “Aperture, or Image Capture”.
How to Use Google Photos to Store All Your PhotosFix: Can’t Delete Photos from iPhone or iPadFix: “iTunes could not restore the iPhone or iPad due to corrupt or…How To Transfer Photos From Galaxy S7 to PC